How to Easily Create a Circle Stamp in Photoshop
How to make a stamp in Photoshop is very easy with the support of the Path or Warped Text feature.

You can make official stamps for offices or companies according to the desired design. All of them can be tried with the features found in Photoshop, without the need for other applications.
Overview of How to Create a Stamp in Photoshop:
- Make 2 different dimensional circles using Elliptical Marquee Tool.
- Fill it with white using Bucket Paint Tool.
- Make a third circle using Ellipse Tool, enable features Path.
- Type the text you want to use around the circle in the stamp.
- Enter the logo if necessary.
- Finished.
Without the need to download a PSD edit-ready stamp, you can generate an official stamp from scratch. It can also be used as a way of creating digital stamps.
Unlike the way to create a stamp in Word, when using Photoshop you have more options. Activate the colors and styles you like to get maximum results.
Creating a Stamp with Circle Path
The initial way that we can use to create a stamp is by using a circle path. Follow these steps:
- Open the Adobe Photoshop application.
- Create a new sheet by clicking File > New. You can also use shortcuts on the keyboard by pressing CTRL+N.
- Determine the size. For round stamps, make sure the width and height are the same. For example 300 x 300 pixels. choose background content transparent.

- Make a small black dot right in the middle with the support Brush Tool.

- Create a new layer by clicking Layer > New > Layer.

- Make a circle with Elliptical Marquee Tool. To make sure the circle is perfectly shaped, drag it while holding down the button Shift.

- Give color with a click Paint Bucket Tool. Make sure the color used is white.

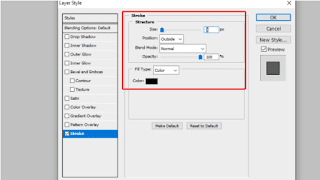
- Give a black stroke effect by clicking on the Layer > Layer Style > Stroke.

- Choose the appropriate thickness. In this tutorial, we are using 3 px. Choose black.

- After the outline of the circle has been formed, click Ctrl+D. This shortcut can remove the function of the Elliptical Marquee Tool.
- On that layer, select blending mode > color. Thus, the black dot remains visible.

- Create another new layer, then create a smaller circle. The trick is the same as above.

- Create a new layer, make a third circle. But this time, its function is as a way to make circular text in Photoshop. Click Ellipse Tool, activate Path, then create a circle by pressing Shift.

- Create a new layer. Click Type Tool > Horizontal Type Tool. Bring the tool closer to the circle path, until there is a crooked line. Click, then type the desired words. Set the font and color.

- Create a new layer, make a circle, then apply Paint Bucket Tool to give it a white color, close the black dot in the middle.

Now the stamp is finished. You can also add a logo image in the center by drag and drop from the logo image file.
Creating a Stamp Without a Path Circle
The second way is to make a stamp without a circle path. To do this, follow these steps:
- Open the Adobe Photoshop application.
- Create a new sheet by clicking File > New. You can also use shortcuts on the keyboard by pressing CTRL+N.
- Determine the size. For circular stamps, make sure the width and height are the same. For example 300 x 300 pixels. choose background content transparent.
- Make a circle with Elliptical Marquee Tool, according to the desired size.
- Right click on the image, then select stroke to outline the circle

- Options will appear for the appearance of the outline, such as Width (thickness), Color (color), and so on. In this tutorial, we are using 8 px thickness.

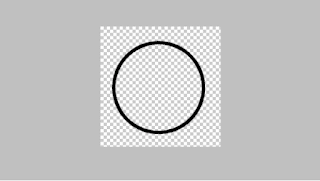
- The first circle will be shaped like the image below:

- Make a second circle, with a small size. You can use the same method as before, or another way, namely with the Transform Selection. The trick is to right-click the first circle that has been created > Transform Selection.
- Set the size of the second circle.
- Outline the second circle, using the same steps as above.

- Currently, you can add text according to the desired design. Use Type Tool (symbol T) > Horizontal Type Tool.
- Set the desired font type, size or color.
- Curved text shape, with a click Create Warped Text.

- In the window that appears, set Style > Arch. On options Bend, increase the number until it matches what you want. In this tutorial, Bend used is +100. When it is appropriate, click OK.

- Add the desired logo if necessary, by drag > drop.
- If you want to make text for the bottom, duplicate the text layer, then change the text. After that, adjust Bend.

- Save the design that has been made. To do so, click File > Save As. You can also use shortcuts on the keyboard by pressing Ctrl+Shift+S.
Note: If you want a file with a transparent background, save the image in PNG format.
Conclusion
So that’s how to make a stamp in Photoshop, pretty easy right? Hopefully useful and good luck!
